




Laser Protective Lens (Protective Window) - Sizes, Stages and Grades for Fiber Laser Heads
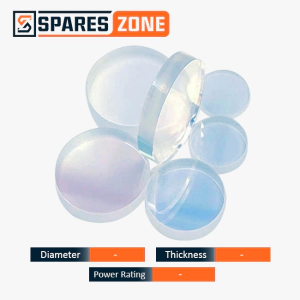
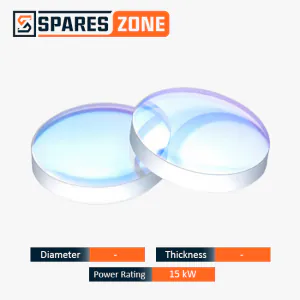
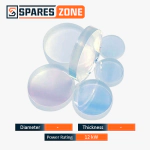
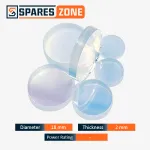
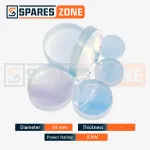
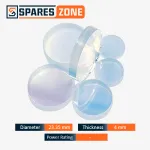
A laser protective lens - the same part manufacturers call a laser protective window - is the flat, sacrificial disc of glass that takes the spatter, fume and dust a fiber laser throws back up, so the shaped optics behind it stay clean. It has no optical power and is meant to be used up. A head can carry a laser protective lens at each of two stages, and the RayTools range stocks both: a thick focusing-side window below the focus lens, which is the fastest-moving optic in the head, and a much thinner collimation-side window in the sealed upper section, which rarely moves. Every size is quoted as diameter x thickness in mm - 27.9 x 4.1, 30 x 5 and 37 x 7 are among the most common - and both numbers have to match the seat. Grade follows laser power: optical glass to roughly 6 kW, quartz to roughly 8-10 kW, JGS1 fused silica from 10 kW to 30 kW. SparesZone holds 177+ sizes across the RayTools, WSX, OSPRI and BOCI ranges, with same-day dispatch from Ahmedabad and delivery in 1-7 days across India.
How to Order the Right Laser Protective Lens - Three Checks Before You Buy
Almost every wrong order on this part fails one of three checks, and all three take under a minute at the machine. Work them in this order and the part that arrives is the part that fits:
- Establish which stage you are replacing. The focusing-side lens low in the head and the collimation-side lens high in the head are both called "the protective lens", and they are nowhere near the same size. Ordering the one you changed last time instead of the one that is actually due is the single most common mistake on this part - the two-stage table below shows how to tell them apart.
- Measure both numbers off the old lens, with a vernier. Diameter across the flat face, thickness across the edge, two or three readings each so a chipped rim does not skew the figure. The lens you are removing outranks a model number, a purchase order or anyone's memory. Around two tenths of a millimetre out on either dimension is enough to stop it seating and sealing - and a lens that does not seal is worse than none, because it lets dust travel continuously towards the optics it was fitted to protect.
- Match the grade to your laser power, not to the size. The same physical size is supplied in more than one substrate, so the diameter and thickness will never tell you which one is in the box. State your machine's power output with the order and the matching grade ships - the material table further down shows which grade suits which power.
Old lens already shattered, a head that came rebadged from an integrator, or a head brand not named on this page? Photograph the head, or send the two measurements, on WhatsApp to +91 92740 95891. Fitment is decided by size rather than by the badge on the head, so we will tell you straight away whether it is a size we hold - and if it is not, we will say so rather than ship you something close.
177+ Laser Protective Lens Sizes for RayTools, WSX, OSPRI and BOCI (BOCHU) Heads
A laser protective lens is consumed rather than maintained, so the thing that actually matters is whether your exact size is on a shelf today - not whether it is the most expensive glass available. SparesZone keeps 177+ laser protective lens sizes in ready stock across four head brands - RayTools, WSX, OSPRI and BOCI (BOCHU) - for fiber laser cutting and welding heads, in optical glass, quartz and JGS1 fused silica, with several sizes listed in both Original and OEM grades. Every order carries a GST invoice under GSTIN 24AFSFS3212F1Z2, and bulk rates apply for workshops, service engineers and dealers. Whether your purchase order says laser protective lens or laser protective window, it is the same part and it finds the same listing here.
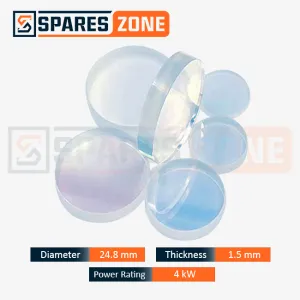
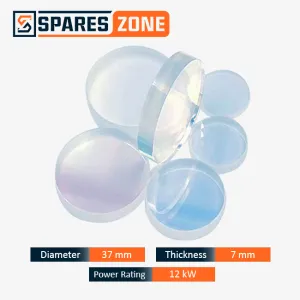
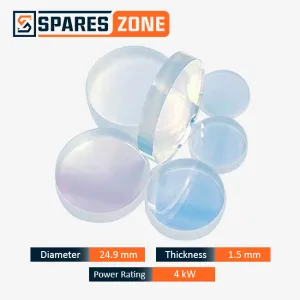
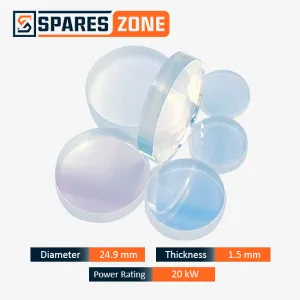
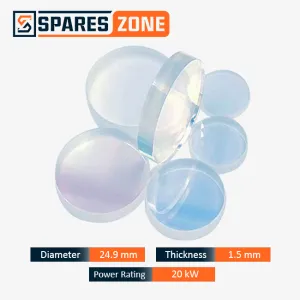
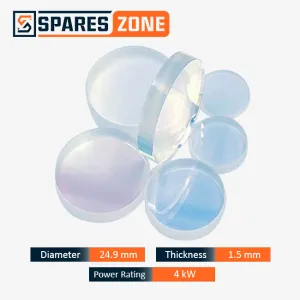
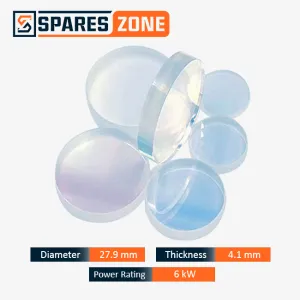
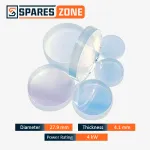
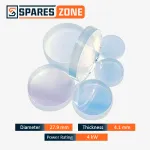
RayTools protective lens. The RayTools range covers both stages of the head. On the focusing side the sizes step up with power class - 27.9 x 4.1 mm on standard heads up to 6 kW, 30 x 5 mm on higher-power heads, and 37 x 7 mm at the top for 12-15 kW machines. The collimation side takes the 24.9 x 1.5 mm window, listed here from 4 kW to 20 kW. Beyond those, the RayTools listings at the 15 kW class run from 21.5 x 2 mm up to 55 x 1.5 mm. The range fits BM109, BM111, BM114S, BT210S, BT240S and BT240S-RC heads with drawer-type lens holders, but that list describes the range rather than any one size, so the lens you are removing is still the specification worth trusting.
WSX protective lens. The WSX listings run from 18 x 2 and 20 x 1.5 mm at the small end up to 100 x 3 mm at the 20 kW class, with 22.35 x 4, 27 x 2, 27.9 x 4.1, 30 x 2, 30 x 5, 34 x 5 and 36 x 5 among the sizes in between. Many of them share a diameter - 25 x 2 and 25 x 3, or 37 x 1.6, 37 x 3.5, 37 x 5 and 37 x 7 - and many share a thickness, which is exactly why a single measurement never settles a WSX order. The near-size table further down is worth reading before you buy this brand.
OSPRI protective lens. The OSPRI listings cover the same spread as the other brands - 21.5 x 2, 27.9 x 4.1, 30 x 5, 34 x 5 and 50 x 2 mm among them - so on an OSPRI head the two dimensions off your old lens decide the order, and your machine's power decides the grade.
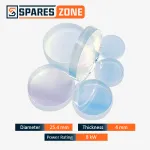
BOCI (BOCHU) protective lens. BOCI heads are listed on this site under the BOCHU name, with 15 kW class sizes ranging from 21.5 x 2 mm to 55 x 1.5 mm. The 25.4 x 4 mm size at the 8 kW class and the 34 x 5 mm size at the 15 kW class are both listed in Original and OEM grades.
Laser welding protective lens. The 18 x 2 mm size is listed here as a welding lens for 4 kW laser welding heads. Welding-side suppliers often call this part a laser welding protective window; it is the same flat sacrificial disc, and the same rule applies - diameter and thickness both have to match the one you remove.
One size, several brand names. Most sizes on this page are listed under more than one head brand - search 27.9 x 4.1 and it appears under WSX, OSPRI and RayTools. The brand on a listing tells you which catalogue it was filed under, while the two dimensions tell you whether it will fit. If your head takes 27.9 x 4.1, you are buying the size, and the brand name is how you find it.
Your Head Has More Than One Laser Protective Lens - Know Which One You Are Replacing
Settle this before anything is ordered, because every one of them gets called "the protective lens" in conversation and they are different parts on different replacement cycles. The head manuals treat them separately: the WSX NC30A user manual, for example, carries three distinct replacement procedures, one each for Protective Window 1, 2 and 3, each with its own fixing parts. Your own head's manual gives the count and position for that model.
What matters commercially is that the stages behave nothing alike: the lower, focusing-side laser protective window is consumed constantly, while the upper, collimation-side one sits behind a seal and should barely move for months. The sizes below are the RayTools range, where both stages are stocked:
| Parameter | Focusing-side protective lens | Collimation-side protective lens |
|---|---|---|
| Position in the head | Lower section, below the focus lens | Upper section, near the fiber connector |
| Optic it protects | Focus lens | Collimating lens |
| Working conditions | Directly exposed to spatter and fume from the kerf | Sealed section of the head |
| RayTools sizes | 27.9 x 4.1, 30 x 5 and 37 x 7 mm, stepping up with power class | 24.9 x 1.5 mm, listed from 4 kW to 20 kW |
| Replacement cycle | The fastest-moving optic in the head | Rarely - inspect whenever the head is open |
| Interchangeable? | No - far too large for the collimation-side seat | No - far too small and thin for the focusing seat |
Laser Protective Lens vs Focus Lens vs Collimating Lens - Three Optics, One Word
The word "lens" covers three different parts inside a cutting head, at three very different price points. Ordering by a remembered number is where this goes wrong, because a head model, a focusing optic and a protective disc can all carry the same figure:
| Part | What it actually is | How often it is replaced |
|---|---|---|
| Protective lens (protective window) | Flat glass with no curvature and no focal length - a sacrificial consumable | Weekly to monthly, on condition |
| Focus lens | A curved precision optic that brings the beam to a point at the sheet | Rarely - it is what the protective lens exists to shield |
| Collimating lens | A curved precision optic that straightens the beam leaving the fiber | Rarely, in the sealed upper section of the head |
| Head model number | Not a consumable at all - for example an NC30 is a WSX cutting head | Not applicable |
Ask for "a 30" and it could mean a 30 mm focusing lens, a 30 x 5 mm protective lens or a 30 x 2 mm protective lens, and those are three different parts at three different prices. Say the word "protective" out loud when you order, and say the thickness, and the ambiguity disappears.
Laser Protective Lens Size Chart - Diameter x Thickness and Power Class
Whether a listing calls it a laser protective lens or a laser protective window, sizes are always written diameter first, then thickness, both in millimetres. The power class is the one each size is listed under on this site. Use the chart for orientation and then confirm against the lens in your hand - it does not guarantee fitment on any individual head model:
| Size (D x T) | Listed power class | Notes |
|---|---|---|
| 18 x 2 mm | 4 kW | Listed as a welding lens for laser welding heads |
| 20 x 1.5, 20 x 2, 20 x 3, 20 x 4 mm | Not stated in the listing | Four thicknesses on one 20 mm diameter - measure thickness every time |
| 21.5 x 2, 22.35 x 4 mm | 21.5 x 2 at 10 kW and 15 kW | Small-diameter cutting-head sizes |
| 24.9 x 1.5 mm | 4 kW to 20 kW | The RayTools collimation-side window |
| 25 x 2, 25 x 3, 25.4 x 4 mm | 25.4 x 4 at 4 kW and 8 kW | 25.4 x 4 at 8 kW is listed in Original and OEM grades |
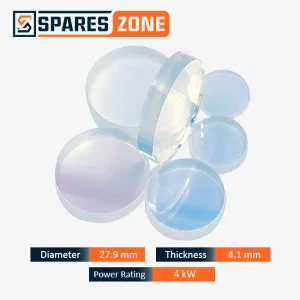
| 27 x 2, 27.9 x 4.1 mm | 27.9 x 4.1 at 4 kW and 6 kW | 27.9 x 4.1 is the RayTools focusing-side size for standard heads up to 6 kW |
| 30 x 2, 30 x 5 mm | 30 x 2 at 4 kW; 30 x 5 at 4 kW and 6 kW | Same diameter, 3 mm apart in thickness |
| 32 x 2, 34 x 3, 34 x 5, 35 x 4 mm | 34 x 5 at 10, 15 and 20 kW; 35 x 4 at 12 kW | 34 x 5 at 15 kW is listed in Original and OEM grades |
| 36 x 3, 36 x 5 mm | 36 x 3 at 6 and 12 kW; 36 x 5 at 10 and 15 kW | Same diameter, 2 mm apart in thickness |
| 37 x 1.6, 37 x 3.5, 37 x 5, 37 x 7 mm | 37 x 7 from 6 kW to 30 kW; the others at 15 kW | Four thicknesses on one 37 mm diameter; 37 x 7 is the RayTools size for 12-15 kW heads |
| 38 x 2, 38.1 x 1.6 mm | 15 kW | 0.1 mm apart in diameter - measure carefully |
| 40 x 2, 40 x 2.5, 40 x 5, 40 x 7 mm | 15 kW | Four thicknesses on one 40 mm diameter |
| 42 x 9 mm | 15 kW | The thickest sizes in the range run 9 mm |
| 50 x 2, 50 x 4 mm | 50 x 2 at 15 and 20 kW; 50 x 4 at 15 kW | Large-diameter sizes |
| 55 x 1.5, 55 x 9 mm | 55 x 1.5 at 15 kW; 55 x 9 at 20 kW | Same diameter, 7.5 mm apart in thickness |
| 100 x 3 mm | 20 kW | The largest diameter in the range |
Read down the chart and one thing is plain: the same diameter turns up again and again at different thicknesses, and power class does not predict either number. That is why a size is quoted as a pair, and why neither figure identifies the part on its own. The chart is a guide to the range rather than a complete list, so a measurement missing from it is still worth asking about.
Laser Protective Lens Specifications at a Glance
Diameter and thickness decide whether a laser protective lens fits. The rest of the specification decides how the window behaves once the holder is closed on it. These are the parameters the range is listed under:
| Parameter | Specification |
|---|---|
| Optic type | Flat laser protective window - zero optical power, designed to be consumed |
| Size range | 18 mm to 100 mm in diameter and 1.5 mm to 9 mm thick, written diameter x thickness |
| Stages in the head | Focusing side (lower) and collimation side (upper) |
| Substrate | Optical glass, quartz or JGS1 fused silica, matched to laser power |
| Coating | Anti-reflective on both faces on the RayTools listings |
| Design wavelength | 1064-1080 nm fiber laser band on the RayTools listings |
| Transmittance | Over 99% on the RayTools fused-silica listings |
| Power classes listed | 4 kW to 30 kW |
| Grades | Original and OEM, both listed on several sizes |
| Holder type | Drawer-type lens holder on RayTools BM and BT heads |
The coating, wavelength and transmittance rows are the figures given on the RayTools listings. For any other size, check the individual product listing, and treat the laser protective window you are removing as the final word on dimensions.
Why Thickness Is Not Negotiable - What a Flat Laser Protective Window Does to Your Focus
A laser protective lens has no optical power, but it is not optically neutral either. Any flat protective window sitting in a converging beam pushes the focal point further from the lens by roughly t(n-1)/n, where t is the thickness and n the refractive index of the glass. Fused silica sits close to 1.45 at 1064 nm, so the displacement each thickness introduces works out as follows:
| Lens thickness | Focus displacement | Example sizes at this thickness |
|---|---|---|
| 1.5 mm | About 0.47 mm | 20 x 1.5, 24.9 x 1.5, 55 x 1.5 |
| 1.6 mm | About 0.50 mm | 37 x 1.6, 38.1 x 1.6 |
| 2 mm | About 0.62 mm | 18 x 2, 21.5 x 2, 27 x 2, 30 x 2, 32 x 2, 38 x 2, 40 x 2, 50 x 2 |
| 2.5 mm | About 0.78 mm | 40 x 2.5 |
| 3 mm | About 0.93 mm | 20 x 3, 25 x 3, 34 x 3, 36 x 3, 100 x 3 |
| 3.5 mm | About 1.09 mm | 37 x 3.5 |
| 4 mm | About 1.24 mm | 20 x 4, 22.35 x 4, 25.4 x 4, 35 x 4, 50 x 4 |
| 4.1 mm | About 1.27 mm | 27.9 x 4.1 |
| 5 mm | About 1.55 mm | 30 x 5, 34 x 5, 36 x 5, 37 x 5, 40 x 5 |
| 7 mm | About 2.17 mm | 37 x 7, 40 x 7 |
| 9 mm | About 2.79 mm | 42 x 9, 55 x 9 |
None of that is a fault and nothing needs correcting. Your machine was commissioned with a laser protective window of its designed thickness in place, and every program on the controller already accounts for it. What the table is really for is the substitution decision: fitting a different thickness moves your focus by the difference between two rows. Swap a 5 mm lens for a 2 mm one of the same diameter and the focus shifts by about 0.93 mm - the lens seats, the retainer closes, the machine runs and nothing alarms. It surfaces days later as edge quality that drifts through a shift, piercing that has turned unreliable, and an operator working through parameter screens hunting a cause that was never in them.
Figures above are calculated for fused silica at 1064 nm. Common optical glasses have a slightly higher refractive index than fused silica, so at the same thickness they displace the focus marginally further - another reason to replace like with like rather than substituting across grades mid-job.
The Near Sizes That Cause Wrong Protective Lens Orders
Wrong orders on protective lenses are rarely carelessness. They happen because neighbouring sizes are each close to one another in a different way, so no single measurement rules all of them out:
| If your size is | The trap that shares a diameter | The trap that shares a thickness |
|---|---|---|
| 27.9 x 4.1 mm | 27 x 2 mm - only 0.9 mm smaller across, visually identical on a bench | 22.35 x 4 mm - thickness 0.1 mm apart, but 5.55 mm too small to fill the seat |
| 30 x 5 mm | 30 x 2 mm - drops straight into the seat and moves the focus about 0.93 mm | 34 x 5 and 36 x 5 mm - same thickness, 4 mm and 6 mm too large to enter |
| 37 x 7 mm | 37 x 5, 37 x 3.5 and 37 x 1.6 mm - the 37 x 5 drops into the seat and moves the focus about 0.62 mm | 40 x 7 mm - same thickness, but 3 mm too large to enter |
Read the table as a whole and the rule writes itself. Measuring only diameter lets the thin near-sizes through; measuring only thickness lets the over-diameter ones through. The dangerous half is always the one that shares the diameter, because it physically seats and the machine keeps producing parts while the focus sits in the wrong place.
Laser Protective Window Material - Optical Glass, Quartz or JGS1 Fused Silica
Size decides whether the lens fits. Material decides how long it survives, and it is the choice most buyers never make deliberately - they accept whatever grade the size happened to arrive in. Every laser protective window here is supplied in one of three grades, and the sensible approach is to match the one you order to the power the lens will actually sit under:
| Material | Suited to | What you are buying |
|---|---|---|
| Optical glass | Up to roughly 6 kW | The lowest cost per change on machines that will never stress the substrate |
| Quartz | Up to roughly 8-10 kW | Thermal headroom for the mid band, where glass starts to struggle |
| JGS1 fused silica | 10 kW to 30 kW | Thermal stability under sustained high power, across a full shift |
The error runs in both directions and both cost money. Specifying fused silica for a 3 kW machine buys thermal performance the lens will never be asked for. Running a plain optical-glass laser protective window on a 12 kW machine is the more damaging mistake, because sustained heat at that power turns the window itself into the failure point - and a lens that cracks in service has stopped protecting anything above it.
Coating belongs in the same decision. An anti-reflective coating on both faces is where a small extra cost genuinely repays itself: high-power work, and fine cutting where beam throughput and consistency are what you are paying for. Where both faces carry the same AR coating there is no orientation to get wrong during a fast change.
Original or OEM Laser Protective Lens - Choosing the Grade
Several sizes are listed in two grades, Original and OEM - the RayTools 27.9 x 4.1 and 24.9 x 1.5 mm sizes and the BOCI 34 x 5 and 25.4 x 4 mm sizes among them. Original means the genuine brand part, supplied in the brand's own packaging and channel. Where that earns its place is in the paperwork rather than in the optics: a machine running under a service agreement that names genuine parts, or a workshop that needs brand-marked packaging for internal traceability or audit.
What decides whether any laser protective lens actually works in your head is the same for both grades. The diameter and thickness have to match the seat so the laser protective window sits square and the holder closes properly, the substrate has to suit the power it will run under, and the anti-reflective coating has to be intact on both faces. If neither of the paperwork reasons applies to your machine, those three checks are what the choice comes down to.
Reading the Wear Pattern on a Used Laser Protective Lens
A used protective lens records what happened to it, and reading that record stops you ordering parts that were never at fault. Inspect it properly first: hold it at an angle under a bright light rather than looking straight through it. Damage that is invisible face-on lights up as scatter the moment light rakes across the surface, which is how a lens that "looked fine" ends up coming out of a head that was cutting badly.
| What you see | What it usually means | What to do |
|---|---|---|
| Fine, even pitting or frosting on the lower, sheet-facing face | Ordinary spatter wear - the consumable doing its job | Replace; this is expected and needs no investigation |
| Heavy burning concentrated in one spot, or damage biased to one side | Beam striking contamination, off-centre beam, or localised overheating | Replace, then check beam centring and focus before running again |
| Oily haze or film that only partly wipes off | Fume residue from weak extraction or cross-jet airflow | Clean with lint-free optical tissue and isopropyl alcohol; improve extraction |
| Fogging or droplets on the upper, head-facing face | Coolant or condensation inside the head from a failed seal - the pattern most often written off as a bad batch | Stop and inspect the seals; a replacement lens fogs the same way within hours |
| Patchy or rainbow discolouration in the surface | Coating damage rather than dirt on the coating | Replace; if it recurs, step up to dual-side AR or a higher grade for your power |
| Chip or crack at the edge with no impact mark | Thermal shock, or the glass forced against its seat during fitting | Replace; check the seating face, and close the holder by hand rather than with a tool |
| Lens life suddenly collapsing from weeks to hours | Usually the nozzle - a nicked, oval or off-centre tip flicks molten material upward instead of clearing it through the kerf | Inspect and change the nozzle before ordering more glass; consumption normally returns to normal on its own |
How Often to Change a Laser Protective Lens
No protective lens has a fixed lifespan, and a supplier quoting one in hours is guessing. What it survives depends on the material being cut, how clean the assist gas and extraction are, how often the machine pierces, and how much power passes through it. Use these as stock-planning figures rather than as a service schedule:
| What you cut | How often to inspect | Typical replacement, single 8-hour shift |
|---|---|---|
| Mild steel (oxygen) | Daily | Every 2-4 weeks |
| Stainless steel (nitrogen) | Daily | Every 1-2 weeks |
| Aluminium, brass and copper | Every shift | About weekly - reflective metals throw harsher spatter and it sticks harder |
| High power, 10 kW and above, any material | Every shift, no exceptions | As short as a few days under heavy load |
What actually triggers a change is evidence, not the calendar: a burn ring, pitting that will not clean off, a sudden drop in cut quality, or assist gas consumption climbing with nothing altered on the settings. Any one of those and the lens has finished its working life.
The economics are what make changing early the right call rather than a cautious one. A laser protective lens is the cheapest optic in the head. The focus and collimation lens it shields cost many times that, and a head strip-down for a contaminated focus lens means hours of lost production on top of the part cost. Keep a pack on the shelf rather than a single spare - this is the part most likely to stop a machine mid-shift, and the stock cost is negligible against one unplanned stoppage on a paying job.
How to Replace a Laser Protective Lens - Step by Step
The change itself takes minutes. What makes it a clean job rather than a contamination event is the order you do things in:
- Stop the laser and power the head down. Never open the lens drawer while the laser is able to emit.
- Clean the outside of the head first. Opening a cutting head is itself a contamination event, and any dust sitting on the housing around the drawer falls straight towards the optics the moment it opens. The WSX NC30A manual asks for exactly this - blow the dust off the head with compressed air before any maintenance.
- Have everything on the bench before the drawer comes out. The replacement lens, a spare seal, lint-free optical tissue or lens cleaning paper, isopropyl alcohol, clean gloves or finger cots and a vernier - plus a collimation-side window on the shelf if the head has not been opened for a while. Lens cleaning swabs, lens cleaning paper and IPA spray are all listed on this site alongside the lenses.
- Check your manual on orientation, then pull the drawer. The OEMs differ here: the RayTools BM111 procedure fits the new lens into the drawer-type holder regardless of which side faces up, while the WSX NC30A manual says to record the position and orientation of each window before maintenance and reassemble it as recorded.
- Lift the old lens out by the rim and read it before it goes in the bin. Which face is marked, and how, tells you whether the lens was the problem or only the symptom - the wear pattern table above covers each case.
- Check the seal and the seating face. A flattened or perished seal lets dust past continuously; replace it if in doubt, and make sure the seat is clean before anything goes back on it.
- Measure and inspect the new lens. Put the vernier on both dimensions rather than trusting the packet, and check it under raking light to confirm it is clean and undamaged.
- Seat it square and close the holder by hand. The WSX NC30A manual states it plainly - do not operate with a wrench or iron pliers - and glass forced against its seat is how edge chips start.
- Run a test cut before going back to production. If cut quality has not recovered, the cause is elsewhere - the nozzle, the focus position or the window at the other stage.
Cleaning, handling and storing it between changes:
- Hold it by the rim in clean gloves or finger cots, because skin oil on the clear aperture bakes in permanently under the beam
- Clean a fume film with lint-free optical tissue wetted with isopropyl alcohol, drawn across the face once and then discarded
- Never dry-wipe a gritty lens, because dragging bonded spatter across the glass cuts the scratches that become the next burn sites
- Anything still visible after a wet pass is damage in the surface rather than dirt on it, and no further cleaning recovers it
- Store spares flat in their packaging with desiccant, away from grinding dust, and rotate stock oldest-first
Why Indian Job Shops Buy Laser Protective Lenses from SparesZone
- Bulk rates for job shops, service engineers and dealers, with each grade priced by size and power class
- 177+ sizes in ready stock across both head stages, so the size you need is a stock item rather than an enquiry
- Substrate matched to your machine's power, and Original or OEM grade on several sizes, instead of one grade sold into every head
- Size confirmed on WhatsApp before you order, by someone who handles fiber laser consumables every day
- One supplier for RayTools, WSX, OSPRI and BOCI (BOCHU), so a mixed-brand workshop orders every head from one place
- Protective lenses, focus and collimating lenses, nozzles and seals on one invoice, so a head service arrives in one box
- GST invoice on every order under GSTIN 24AFSFS3212F1Z2, with credit-ready documentation on each dispatch
- Same-day dispatch from our Ahmedabad, Gujarat warehouse with delivery in 1-7 days across India
Laser Protective Lens - Frequently Asked Questions
A flat, sacrificial glass disc inside a fiber laser head that shields the focus and collimating optics from spatter, fume and dust.
A laser protective lens is the flat, sacrificial disc of glass fitted inside a fiber laser cutting or welding head to shield the shaped optics from spatter, fume and dust. Despite the name it is not a lens at all - it has no curvature and no focal length, which is why manufacturers call it a protective window. It is designed to be consumed and replaced, and it is the cheapest part in the head as well as the one that decides how long the expensive optics last.
None - they are two names for the same part.
There is none; a laser protective lens and a laser protective window are the same part. "Laser protective window" is the technically accurate term and the one printed in manufacturer documentation, because the part is flat glass rather than an optic with power. "Protective lens" is what most Indian shop floors say. Both terms are listed here so either search finds the right component, and a purchase order using either wording will be understood.
More than one - at least one on the collimation side and one or more on the focusing side. Your head manual gives the exact count.
More than one, and the head manual gives the exact count - the WSX NC30A manual, for example, has separate replacement procedures for Protective Window 1, 2 and 3. On a RayTools head the focusing-side 27.9 x 4.1 mm lens and the collimation-side 24.9 x 1.5 mm lens are the two to know. The lower, focusing-side lenses wear fastest because they face the kerf; the upper one sits behind a seal. They are different sizes, and none will do another's job.
27.9 mm diameter by 4.1 mm thickness - and both numbers have to match the seat.
Diameter first, thickness second, both in millimetres - 27.9 mm across the flat face and 4.1 mm through the edge. A head only accepts a lens that matches both figures, and the tolerance is tight: about 0.2 mm off on either figure stops the lens seating and sealing.
No - a different thickness moves the focus, and the machine gives no alarm when it happens.
No. A flat window in a converging beam shifts the focus by roughly t(n-1)/n, so a 2 mm lens fitted in place of a 5 mm one of the same diameter moves the focus about 0.93 mm. It seats, the machine runs and nothing alarms - the cost shows up later as drifting edge quality and unreliable piercing.
Optical glass to roughly 6 kW, quartz to roughly 8-10 kW, JGS1 fused silica from 10 kW to 30 kW.
Optical glass up to roughly 6 kW, quartz to roughly 8-10 kW, and JGS1 fused silica from 10 kW to 30 kW. Under-specifying is the costlier mistake, because plain optical glass under sustained high power becomes the failure point itself.
Choose Original when a service agreement or traceability needs the genuine brand part; otherwise choose on fit, substrate and coating.
Choose Original when a service contract on the machine requires genuine brand parts, or when brand-marked packaging is needed for traceability or audit. Otherwise the grade matters less than three checks that apply to both: dimensions matching the seat, a substrate suited to your power, and an intact anti-reflective coating on both faces.
Power down, clean the head, pull the drawer, check the seal, fit a measured lens square by hand, then run a test cut.
Power the head down and clean its outside before opening the drawer. Remove the old lens by its edge, check the seal and seat, measure and inspect the new lens, and fit it square, closing the holder without tools. Follow your own head manual on orientation, and finish with a test cut.
On condition - typically every 1-4 weeks on steel in a single shift, faster on reflective metals and above 10 kW.
There is no fixed lifespan, so replace on condition. As a stock-planning guide on a single 8-hour shift: mild steel every 2-4 weeks, stainless every 1-2 weeks, aluminium, brass and copper about weekly, and as little as a few days above 10 kW. Visible burn marks, pitting that survives a wet clean or a sudden drop in cut quality mean change it now.
Fog on the upper, head-facing face points to a failed seal or condensation inside the head, not a bad lens.
Look at which face is affected. Fog or droplets on the upper, head-facing side come from coolant or condensation inside the head through a failed seal, so every new lens will fog the same way until the seal is fixed. Marks on the lower, sheet-facing side are ordinary spatter wear.
Check the nozzle first - a damaged tip throws spatter up at the lens instead of down through the kerf.
The lens is usually the symptom. A nicked, oval or off-centre nozzle flicks molten material up at the optics instead of clearing it through the kerf. Replace the nozzle first, and lens consumption normally settles back without any further change.
Only a light fume film cleans off; pitting, burns and coating damage mean it has to be replaced.
Sometimes. A light fume film comes off with one pass of lint-free optical tissue wetted with isopropyl alcohol. Pitting, burn marks, bonded spatter and coating discolouration do not, and dry-wiping a gritty lens only scratches it further.
The 18 x 2 mm size - it is listed here as a welding lens for 4 kW welding heads.
The 18 x 2 mm laser protective lens is listed here as a welding lens for 4 kW laser welding heads, and it is the smallest diameter in the range. Welding suppliers often call it a laser welding protective window - it is the same part. Measure the diameter and thickness of the one you remove, because both have to match the seat.
Usually not - that term normally means operator viewing barriers, not the optic inside the head.
Usually not. "Laser safety window" generally refers to acrylic or polycarbonate viewing and enclosure barriers fitted around Class 4 laser systems to protect operators. The small optical disc inside a cutting head - the one that wears out and needs replacing - is a laser protective lens or protective window. If you are after the in-head laser protective lens for RayTools, WSX, OSPRI or BOCI heads, that is what is stocked on this page.
From ₹295 for standard sizes, rising with power class and grade; send your two measurements and machine power on WhatsApp to order.
A laser protective lens starts from ₹295 for standard sizes at SparesZone. Price rises with power class and grade, the product listing on this page shows the current price of every size, and bulk rates apply for job shops, service engineers and dealers. To order, send the two measurements off your old lens and your machine's power output on WhatsApp to +91 92740 95891 and we will confirm the size and grade before you pay. Orders dispatch the same day from Ahmedabad with delivery in 1-7 days across India, on a GST invoice under GSTIN 24AFSFS3212F1Z2.
Related Categories
Get a Quote on a Laser Protective Lens Today
Send the diameter and thickness off your old laser protective lens or protective window along with your machine's power output, and we will confirm the size and the right material grade before you order. 177+ sizes in ready stock, same-day dispatch from Ahmedabad with delivery in 1-7 days, a GST invoice on every order, and bulk rates for workshops, service engineers and dealers. WhatsApp now for an instant quote: +91 92740 95891
Request Quote